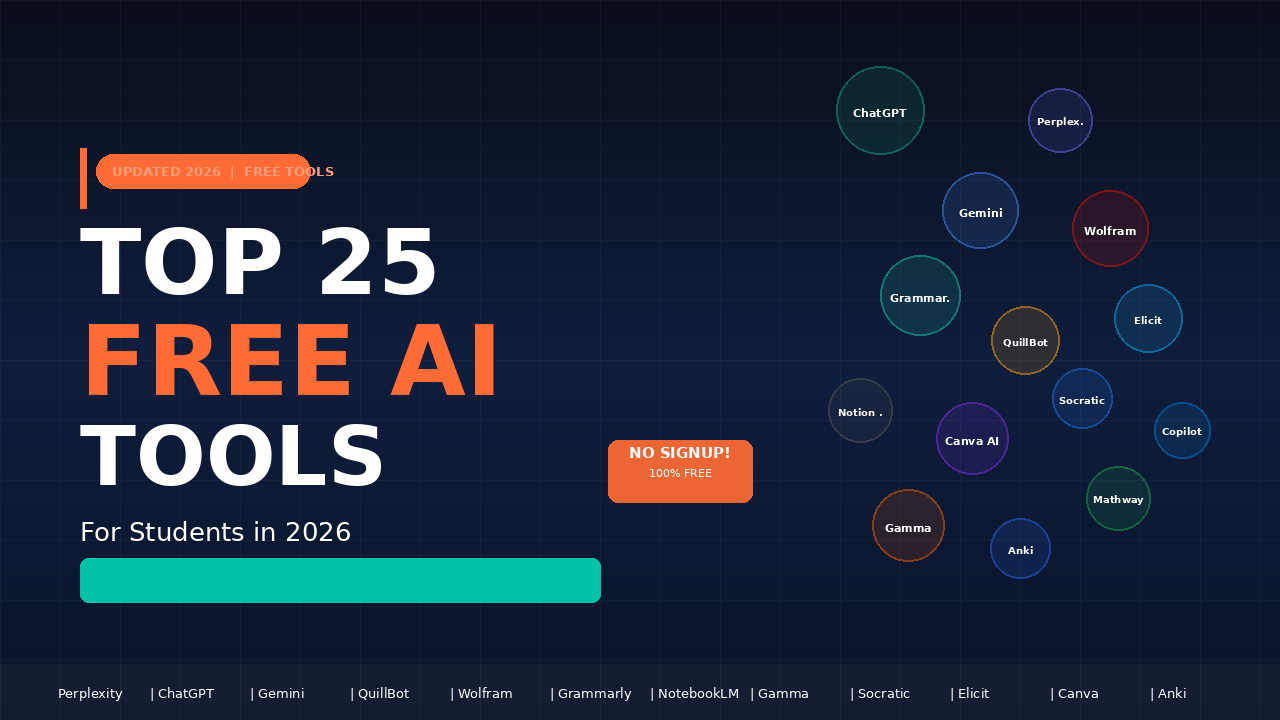
In 2026, the Best Free AI Tools include ChatGPT, Google Gemini, Canva AI, Grammarly, and Perplexity AI. For every writer and designing person, these best free AI tools serve as very good tools with research and automation; and zero cost for anyone who cannot afford more. Whether you are a student, freelancer, marketer, or business owner in USA, UK, Canada, or Australia, these best free AI tools can save you hours every single week and dramatically boost your productivity.
Quick List: Best Free AI Tools in 2026
- ChatGPT — Best free AI tool for writing and conversation
- Google Gemini — Best free AI tool for research and Google integration
- Canva AI — Best free AI tool for design and visual content
- Grammarly — Best free AI tool for grammar and writing improvement
- Perplexity AI — Best free AI tool for real-time web search answers
- Notion AI — Best free AI tool for notes and productivity
- Copy.ai — Best free AI tool for marketing copy
- Runway ML — Best free AI tool for video editing and generation
- Bing Image Creator — Best free AI tool for image generation
- ElevenLabs — Best free AI tool for voice and text-to-speech
Detailed Reviews: The Best Free AI Tools Explained
1. ChatGPT — Best Free AI Tool for Writing and Conversation
There is no doubt that ChatGPT developed by OpenAI is one of the best free AI tools on the planet today. It’s capable of creating articles, responding to challenging questions, coding, summarizing text, composing messages, and engaging in intuitive conversation, all these come free of charge on the basic package.
A huge number of users use ChatGPT every single day in the US, the United Kingdom, Canada as well as in Australia. This is the standard by which most other conversational tools are gauged and for a valid cause; because it is excellent in its function.
Key Features:
- Superior understanding and generation of natural language
- Compose letters, essays, and social media to blogs
- Respond to queries, give explanations of certain things, and resolve issues
- Create or troubleshoot codes in different languages
- Shorten detailed essays and papers in a few seconds
- You can access it either on the website or through the application on the phone
Pros:
- Zero charges on the basic version
- Unbelievably effective in a multitude of different applications
- Developed by OpenAI, it is in constant improvement.
- Works every day without time limits.
- Operates in several languages.
Cons:
- The free option is based on the GPT-4o mini-model instead of the GPT-4o model.
- Accessing the service may sometimes result in receiving out-of-date information.
- Delays can be experienced during high five demand periods.
Target audience: Individuals who would like a free efficient general purpose AI text and intellectual activity tool, including but not limited to authors, students, computer programmers or application users, and non-application users such as advertisers.
2. Google Gemini – The Finest Research Oriented Free AI Software That Can Be Used Alongside by Google Products
‘Google’ ecosystem bound folk – practically most of us do not need much convincing when it concerns bringing tools from this family. Such people already enjoy Google Search, Google Docs, and Gmail and understand the benefit of perfect integration of intelligence with these products alongside Google Drive. Therefore, Google Gemini — formerly Google Bard – is probably one of the best free AI tools a thorough researcher can find.
A significant advantage of Gemini is its ability to access information in real-time through the internet as compared to other tools with fixed training data. This makes it one of the most useful best free AI tools available today especially for students, researchers, and professionals in UK, USA, Canada, and Australia.
Key Features:
- Ability to do web searches in real time
- Total integration with Google workspace applications
- Multimodal – can interpret images as well as text
- Produces essays, summaries and questions and answers
- Is accessible from Android, iOS and Web
Pros:
- No cost when using a Google account
- Users are kept up to date thanks to real-time content availability
- Compatible with Google workspaces such as Docs and Gmail
- Is very useful for learning and verifying the facts
- Has great multimodal features
Cons:
- Cannot match ChatGPT for imaginative literary exercises
- To access premium functionalities, one must subscribe to the paid Google One service
- Sometimes responses are automatically over defensive
Appropriate For: Learners, scholars, workers, and everyone who requires a free AI tool with a background to the most recent information.
3. Canva AI — Free AI Based Designing and Visual Content Tool
It should come as no surprise that most people know about Canva mainly as a designers can use this information to their own benefit, and its AI based features enhance the efficiency of such group of AI tools useful to design vibrant graphics without any prior knowledge in graphic designing. Canva in its basic version offers features including image geerating from words, Magic Write a background removal tool, as well as a presentation creator powered by AI.
Let’s say you are in charge of managing social media for a brand, you own a small business, or you generate content, or advertise products for people in the English speaking countries, Canva AI is one of those free AI tools that will actually help you a great deal towards making professional level visuals in a couple of minutes.
Key Features:
- Inbuilt into the creation platform text to image AI generator
- Copy creator app Magic Write employing artificial intelligence
- Technology is included to automatically remove passive backgrounds
- Adaptive design feature – Magic Resize that allows to quickly add design elements to different sizes without redoing the whole thing
- Dozens of social media posts, auditory presentations and printing templates are provided for free
- And has a drag and drop method of editing with no design skills
Pros:
- A very good free package with most of the AI features in it
- Very easy to use, no training required.
- One piece design and contents driven display
- Member on the web, iOS and Android
- Routinely Updated to leverage new AI based capabilities
Cons:
- Not all templates and AI credits are available in free plans
- Generated images aren’t as good as using Midjourney or other specialized software
- You cannot edit vectors without their things
Excellent For: Social media moderators, creativel, entrepreneurs, educators and free, fast neat visual content makers.
4. Grammarly – one of the best free AI tools designed to help with one’s writing skills.
Ctoanalysers attracts the attention of every person who has to write on a day to day basis. In practice – virtually every person on the planet in this day and age. It optimizes communications in such aspects as grammar, spelling, punctuation, clarity, tone, style and more and is instantly incorporated into every browser you are using – Chrome, Firefox, Safari or Edge.
For one, even the free version of Grammarly is impressively good. It will correct some mistakes, which normal spell-checkers will never point out, ever and will allow you to write with even more authority and clarity. Therefore, when it comes to students, working professionals, or managing directors, who have to write routinely, considering the best free AI tools available at this point in time, this is without a doubt the most useful best AI tool available.
Key Features:
- Real time grammar, spelling and punctuation checks
- Detection of tone and making text concise
- Compatible with browsers, Google Docs and Microsoft Word
- AI based writing recommendations for making expressions concise and effective
- Duplication checking (paid service)
- A writing enhancement plugin that can be used in any browser writers use
Pros:
- The free plan has amazing capabilities
- Usage restriction is not there and it can be used whenever someone wants.
- Enhancement in writing skills can be improved far more quickly and noticeably
- Getting it and starting to work with it is not an issue
- Provisions for every popular browser and operating system are in place with this tool as well.
Cons:
- Higher level suggestions such as complete rephrasing enter a paid subscription only
- Free version does not include the plagiarism checker
- Has a tendency to disrupt writing styles by over-adjustment during casual or creative writing
To whom it is the most recommended: students, bloggers, managers, people learning English as a second language (neo-speakers), employers and any other person who needs to express herself in writing in a more correct and confident manner every day.
5. Perplexity AI – The Best Free AI Tool for In-depth Real-Time Research
Perplexity AI is amongst the most anticipated tools and arguably one of the best free AI tools that have come about in the recent past. The utility leverages a large language model fused with active web search, hence provides precise, verifiable solutions for nearly every inquisitive question the user could think of.
Differing from typical search engines which provide links to be opened, Perplexity instead reads and amalgamates the best available sources to offer succinct and referenced information. For anybody who needs to do much research such as students, journalists, marketers, analysts, to mention a few, it is one of the best free AI tools which assists to quickly gather credible referenced information within a short time.
Key Features:
- Bi-directional real time web searches and the AI produced solutions
- Every response has reference citable options which is easy to trace
- Ability to post follow up questions and carry on the chain of research
- More refined search options- Academic Research or Writing
- Platform supported On web, iOS and Android devices
- Copilot Features that help with research indexation
Pros:
- Completely free to use for simple searches, using no log-in/ no accounts
- The answers are up-to-date and all answers are pointed out
- Cuts special investigations time significantly
- User-friendly conception
- Great for research processes regardless of its application, academic to professional.
Cons:
- Use of a copilot, even for a free version, is limited to a few times per day
- Not suitable to writing long texts
- Occasionally struggles with highly specific technical questions and turns them off completely
Best For: Suitable for potential students, journalists, analysts, research students, and other STRAPP groups who want a quick and precise answer to their complex question without paying for it.
6. Notion AI — Best AI Tool for Workplace Productivity
Notion AI integrates the latest AI technology with the already known and quite popular information and task managing application, Notion. This is the best free AI tool for the enterprise that can help manage knowledge and most likely create materials, and specifically, it can analyze all the expressed ideas in a long meeting or research notes, come up with content for a blog, other ideas in terms of business, and translate certain texts, unlike most free AI content creators.
For users who have already incorporated Notion in their project management or document management processes, the Notion AI integration makes it one of the strongest and best free AI tools already available in the system.
Key Features:
- An AI writing tool included inside the Notion interface
- Summarising, translating, and editing notes and documents already present in the system
- From meeting notes to action items: a single click solution
- Make notes, edit or enhance drafts and even develop texts
- Can be used within any notion page or database
- Accessible via the internet, computer, and phone
Pros:
- Embedded within a very effective productivity application
- Reduces to a large extent the time taken to go through notes and drafts
- Every user of Notion can experiment with AI functions
- Fantastic for working as a group
- Can be accessed on all platforms
Cons:
- Besides theory, Notion AI features need extra payment after a trial period
- Less effective than professional crafting instruments when it comes to extended writing
- Notion user interface is not so easy to use for new users at the beginning
Most Suitable For: Notion users who wish to use AI but do not move from the tool who run Freelance or remote team workload and management efforts students and project managers.
7. Copy.ai –one of the best free AI tools for creating Marketing Copy
Copy.ai is one of the best free AI tools for marketers, copywriters, and entrepreneurs who need to write many marketing copies within a short period. It can, for example, write ad copy, teasers for social media, email subject headlines, field tags for products, landing page copies etc. All these without a lot of help from an operator.
The free version gives the users a reasonable number of monthly runs, which makes it a truly valuable free AI tool for small businesses and freelancers across USA, UK, Canada and Australia who require marketing copy that is of good quality but cannot hire a copywriter on a full time basis.
Key Features:
- Numerous – more than 90 to be precise – copywriting templates that accommodate every type of marketing articulation
- Content writing becomes a breeze with the help of a wizard – blog post wizard to assist in writing long articles
- Generates social media content with the help of artificial intelligence
- Composes subject lines and emails for a sequence
- Assists in writing product details for online business
- Availability of different languages
Pros:
- The free version accommodates templates and tools that are essential
- Greatly shortens the marketing copy writing time
- Assists in dealing with creative- writing related difficulties
- Works well for beginners who have never written copy
- Continuously generates relevant content in the given appropriate desired voice
Cons:
- Free version limits so many given credits in each month
- Some long form articles may need editing
- Free version comes with limited customization in terms of brand personality
Best for: Entrepreneurs, digital marketing professionals, responsive business owners, etailers and copywriting service professionals with a high turn over that also entails mass production on a budget.
8. Runway ML – Best Free Artificial Intelligence Assisted Video Editing and Video Production Tool
Runway ML is one of the best free AI tools for those involved in video editing. It comes with a range of AI based video capabilities that include text to video conversion, vanishing the background, motion analysis, restoration of video frames, and video editing integrated with AI – everything in a web browser without the need for any technical software.
For instance, Runway ML happens to be one of the best free AI tools available in the marketplace for enabling the creation of high-end video content as it does not involve purchasing premium programs or hardware for production purposes, something that video makers, social media practitioners, and online markets are all interested in.
Key Features:
- Writing aided video generation where no shots are involved but just text prompts.
- Capability to remove the background of a video without the need for a green screen using artificial intelligence.
- The ability to remove track motion and objects.
- Editing scenes in a video and using inpainting with the help of AI.
- Transformation of shots using style transfer technology.
- Al works in a browser – there is no need to install it on a computer.
Pros:
• It has free services however it comes with restrictions and monthly allowances.
• The users need not possess any special additional resources for it to work.
• The development of AI video editing tools is vast and ever-increasing.
• It has an easy to use interface hence non-experts can easily learn to use it.
• It can be used for simple and complex video productions.
Cons:
• The free plan is not unlimited and there’s a quality limit of videos that can be exported.
• And the free ones compared to the pay per television ones still have some way to go.
• If one wants to create videos longer than the allowed length they have to be on a paid tier.
Best For: This app is appropriate for use by content creators. YouTubers, social media managers, digital marketers or even filmmakers would be able to play around with AI video tools without having to spend too much money.
9. Bing Image Creator — Best Free AI Tool for Image Generation
DALL-E 3, which is a product of OpenAI, works on Bing Image Creator creating what is in people’s minds. Having said that, it is among the best free tools for coaxing image generation out of a machine and brush of high quality images from description. Unlike other generators where you can pay for each generated image or be a very limited free user with no ability to download anything, Bing Image Creator gives almost unlimited free access as long as the user has a Microsoft account.
For those who need custom made images and can’t afford to purchase subscriptions for stock photo accounts or an automated photo making service, this is an easily the most accessible best free AI tools on the market today.
Key Features
- DALL–E 3 machine learns the generation of images from words
- Creates up to four different symmetrical images upon every request
- Unlimited free image credits topped up every week
- Directly built into Bing Chat app and Microsoft Edge
- High resolution output feasible such as for uploading on social networks and websites.
- Easy beatification of the interface allows even novices to use such a program.
Pros:
- Absolutely free but requires a Microsoft account
- DALL-E 3 is one of the best free tools that create very high quality images.
- No reliance on design skills or any technical expertise
- Displays diverse generative results for every prompt
- Quick processing times
Cons:
- Boost credits run out rapidly on frequent usage
- Does not allow any form of image editing or enhancement of generated images
- There are certain prompts which cannot be used due to the policies in place.
This Is Ideal for Enthusiast Bloggers, Social Network Influencers, Digital Content Creators or Entrepreneurs Looking for Free Yet Appealing Custom Artworks.
10. ElevenLabs – Select Best Form of AI Tool for Text Reading and Voice Generation
Today, among existing services capable of generating AI voices with realistic emotions, Eleven Labs is one of the most advanced ones, offering voice conversion possibilities to enhance any text. This is undoubtedly one of the best free AI tools that anyone working with voices considers primal since there is almost no written content that cannot be turned into voice, classified in terms of tones as well as languages. That helps many podcasters and other video makers, lecturers also those developers who cater for people with special needs.
The limited or free plan does allow some consumption of the service every month that can help in better understanding and using the service. This is one of the best innovations I have seen in best free AI tools as far as the creative niche in the audio content is concerned.
Key Features:
- 29 languages in a human and natural way extremely realistic synthetic speech support
- Pre-recorded huge variety of “AI voice” samples including different accents and tones
- Best voice cloning solutions with upper class subscriptions
- Better control over emotions and tones to help speakers appear less robotic
- API Access Provided to Those Who Build For Their Segment
- Has an_available_web interface in easy to use design
Pros:
- The Free Plan does give some to many users a credit of utilization indeed per month
- Far better voice than most free alternatives
- Versatile voices, accents, and languages
- Quick output even in the complimentary plan
- Perfect for making content accessible and localising content
Cons:
- The character ceiling for free subscription is quite small
- Payment features voice copy, but the option is not free
- Payment plan is necessary for business use
Target Audience: Podcasters, YouTube influencers, curriculum designers, inclusion specialists, and marketers on a budget who want professional AI voiceover services.
Comparison Table: Best Free AI Tools at a Glance
| Tool | Best For | Free Plan | Ease of Use |
|---|---|---|---|
| ChatGPT | Writing & conversation | Yes — generous | Very Easy |
| Google Gemini | Research & Google Workspace | Yes — full access | Very Easy |
| Canva AI | Design & visual content | Yes — core features | Very Easy |
| Grammarly | Grammar & writing quality | Yes — strong free tier | Very Easy |
| Perplexity AI | Real-time research | Yes — unlimited basic | Very Easy |
| Notion AI | Notes & productivity | Yes — free trial | Moderate |
| Copy.ai | Marketing copy | Yes — monthly credits | Easy |
| Runway ML | Video editing & generation | Yes — monthly credits | Moderate |
| Bing Image Creator | Image generation | Yes — weekly credits | Very Easy |
| ElevenLabs | Voice & text-to-speech | Yes — character limit | Easy |
Pro Tips: Maximizing the Effects of the Best Free AI Tools
Tip 1 – Apply the tools’ utmost and create synergy whenever possible.
No tool works in its best way in whatever it does. Write the first draft of your article in ChatGPT, enhance it with Grammarly, create images in Canva AI, or develop bespoke visuals using Bing Image Creator. Stacking the best Free AI Tools in line useful thanks to a composition of the Top-Cut Facilities in each category is more effective than a number of them singly.
Tip 2 – Pick up words for prompts wisely to optimize the output.
It is always observed that the effective utilization of any best free AI tools is determined by the instructions given. State clearly the presentation, style, length, target, and motivation. A broad prompt will give you broad results. A clear and thorough prompt produces an answer that is more useable in one way or another.
Tip 3 – Plan how you will work with free levels of service in order not to break any barriers.
The majority of the best free AI tools come with daily, weekly, or monthly restrictions on usage, which resets at regular intervals. Plan your work around this so that the important and high volume usages occur first after reset and refrain from low end usages till the end of the cycle.
Tip 4 — It’s crucial to verify facts when reporting in an AI-generated context.
Howbest free AItools appear on- line in relation to objects displayed on printable paper. Information shows up about international marketing and geographical masters examples in the best free A. I. tools but they will mislead on some of the real truths. Also, do not ever display, or use, text generated by AI without understanding and confirming certain significant information, numbers, and assertions. Leave out important facts by looking up wherever possible, Perplexity AI with sources does a very good job in giving such support, possible of any other tool source combination.
Tip 5 —Do not put too many AI tools in the same place rather personalize them.
Don’t go for the best free AI tools if they do not align with the actual process flow and use cases. A student and a marketer require a different set of tools. The same for a video editor and coder. Identify the tasks that waste most of your time and the free AI tools catering to educated guesses handling those tasks.
Avoid These Common Mistakes When Using Free AI Tools
Mistake 1: Using AI output as final product.
The best free AI tools serve as excellent aids and not as complete substitutes to one’s own judgment and merit. If AI content is replicated as is, without modifications, additions or factual-checking, then this results in unoriginal and untrustworthy writing. Consider the AI draft as just that, a draft.
Mistake 2: Change of tools is not done for different activities.
Each of the tools available has certain capabilities they can perform well and others they may not be excellent at. When it comes to using one of the best free AI tools for all the activities – creating images using ChatGPT or doing deep research with Canva AI, for example – the outcome is subpar. Use the appropriate tool for the appropriate activity.
Mistake 3: Failure to comply with privacy and data terms.
Before sensitive business details or client profiles or proprietary material are given to any of the best free AI tools you wish to use, check the privacy policy of the service. It is typical for free plans that some user data is exploited for enhancing a model’s performance. Understand what information you are disclosing.
Mistake 4 — Stopping too soon just because results are below expectation.
Poor performance of even the best free AI tools is usually because of how you interact with it, not the tool itself. If a certain tool isn’t producing results as expected, do not ignore the art of constructing better prompts and explore alternative ways to solve the task at hand immediately.
Mistake 5 — Becoming irrelevant over time.
The market for the best free AI tools evolves very fast. In fact, it is worth mentioning that a tool that is substandard when reviewing trends six months back could be marvelous now. Never hesitate to check for new content, updates, and experts’ opinions.
Frequently Asked Questions
What are the best free AI tools available right now?
Some of the best rated AI tools that are free of charge as at the moment include ChatGPT, Google Gemini, Canva AI and Grammarly. Also Perplexity AI Bing Image Creator Copy.ai Runway ML Notion AI ElevenLabs among others. These all specialize in different areas; writing, designing, voice generation and even video generation.
Are the best free AI tools actually free or do they have hidden costs?
None of the best free AI tools above has a required credit card to get to know them. Though, many have also added paid packages offering more benefits, as well as more handy services. In fairness, these free version are of realistic value to the individual consumer or even the few businesses.
Which is the best free AI tool for writing?
The most effective free tool available for content writing, emails, blog posts, essays, scripts, and in fact writing codes generates LLM. This one in a particular aspect is better than the others because it lacks some shortcuts. Take Grammarly, for instance, it is the best app up there without shadow of a doubt, for perfecting writing you have pre-existing done content.
Which is the best free AI tool for generating images?
The answer is the Bing Image Creator in 2026! Its engine is the lauded DALL-E 3 and most importantly, it is the best free of charge tool for generating illustrations from words, hence photo-realistic images, complete with the weekly allocation of free credits. Then close can be noted Canva AI doing very well especially when it comes to design purpose images.
Can I use free AI tools for commercial purposes?
This could be structured on the resources of each individual platform. It is worth noting that there are a number of the best free AI tools that do permit the use of results for commercial purposes even in a free plan whereas a small number do not allow that except for paid users. Also, before marketing ai-generated media, or publishing it elsewhere, always take into consideration the terms of service that you are trading on.
Conclusion: Start Using the Best Free AI Tools Today
The best free AI tools that exist as of 2026 are really impressive — and yet are free. Although one may need a help in writing speed, designing, research, editing videos, image production, or voice content generation, there is an advanced free AI tool that will assist in doing it better and shorter than it would have taken otherwise.
You do not really have to break the bank in order to pay for advanced artificial intelligence. All you need is the proper equipment and the skill to use it.
Firstly, choose one or some of the best free AI tools available that cater to the most urgent of your needs, and learn the tool or tools. Incorporate them in routine practices well and become proficient in their use before adding the rest of them with passage of time. Continual intelligent use of the best free AI tools amalgamated in a sequential manner should provide the kind of advantage that was not available to the majority a few years back.