The Windsor knot is the most recognized and respected tie knot in the world. Named after the Duke of Windsor, it is the knot of choice for job interviews, weddings, formal dinners, business meetings, and any occasion where you want to look polished, confident, and put together. If you already know how to tie a tie at a basic level, learning the Windsor knot is the natural next step.
This guide covers everything you need to know about the Windsor knot — what it is, why it looks better than most other knots, how to tie both the Full Windsor and the Half Windsor step by step, what shirts and occasions each version works best for, and how to fix the most common mistakes people make when tying it for the first time.
What is the Windsor Knot?
The Windsor knot is a wide, symmetrical, triangular tie knot. It is larger and more structured than everyday knots like the Four-in-Hand, which makes it look more formal and deliberate. When tied correctly, the Windsor sits perfectly centered in the collar with a clean dimple just below the knot — that small indentation in the middle of the tie is the mark of a well-tied Windsor.
There are two versions of the Windsor knot:
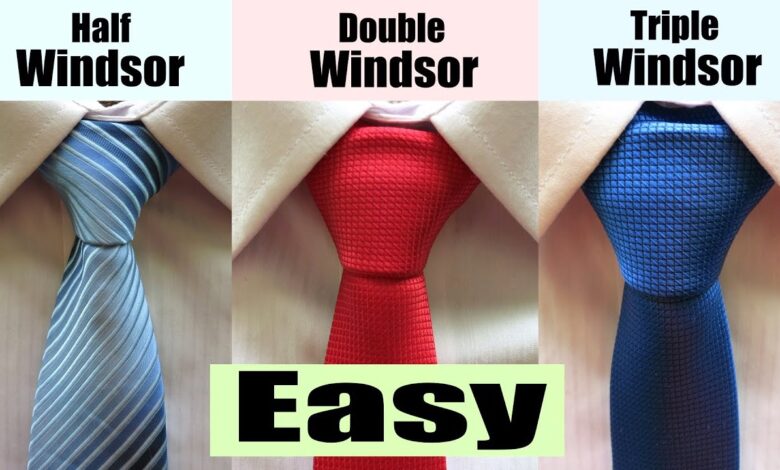
Full Windsor Knot — The larger, more formal version. Creates a wide, thick, perfectly symmetrical triangle. Best for wide spread collars, formal events, presentations, and any situation where you want maximum impact.
Half Windsor Knot — A medium-sized knot that is slightly smaller and easier to tie than the Full Windsor. Works with more collar types and is slightly less formal while still looking sharp and intentional. This is the version most men use for everyday office wear and interviews.
Both versions of the Windsor knot are covered in full detail in this guide.
What You Need
- Any standard necktie (the Windsor works best with regular or slightly thicker ties — very thin ties may not fill out the knot properly)
- A mirror at chest height
- A collared shirt with the collar turned up
- 5 to 8 minutes for your first attempt — after a few tries it takes under 2 minutes
How to Tie a Full Windsor Knot – Step by Step
The Full Windsor knot has more steps than simpler knots, but once you understand the logic behind each step it becomes very easy to remember. The key thing to keep in mind throughout is that you are building a triangular knot by wrapping the wide end around itself in a specific sequence.
Starting position: Drape the tie around your collar with the wide end on your right and the narrow end on your left. The wide end should hang approximately 12 inches lower than the narrow end. If you are taller or using a longer tie, adjust accordingly — you want to end up with the wide end reaching your belt buckle when finished.
Step 1 — Cross the wide end over the narrow end
Bring the wide end (on your right) across the front of the narrow end (on your left). The wide end is now pointing left and sits on top of the narrow end.
Step 2 — Bring the wide end up through the neck loop
Take the wide end and pull it up through the loop around your neck from underneath. The wide end is now pointing upward toward your chin.
Step 3 — Bring the wide end down to the left
Fold the wide end back down and to the left side. The wide end should now be pointing left and hanging in front of the narrow end.
Step 4 — Wrap the wide end behind the narrow end
Take the wide end and pass it behind the narrow end from left to right. The wide end is now pointing right and sits behind the knot you are building.
Step 5 — Bring the wide end up through the neck loop again
Pull the wide end back up through the neck loop from underneath, this time bringing it up on the right side. The wide end is now pointing upward again on your right side.
Step 6 — Bring the wide end across the front from right to left
Pass the wide end across the front of the knot from right to left. This creates the horizontal band across the front of the knot that you will use in the next step. The wide end is now pointing left and sits on top of the knot.
Step 7 — Bring the wide end up through the neck loop one final time
Pull the wide end up through the neck loop from underneath for the third time. The wide end is now pointing upward.
Step 8 — Pull the wide end down through the front horizontal band
Take the wide end and slide it down through the horizontal band you created in Step 6. Pull it all the way through until it sits flat.
Step 9 — Tighten and adjust
Hold the narrow end firmly with one hand and gently slide the knot up toward your collar with the other hand. The knot should tighten into a clean, wide, symmetrical triangle. Use your fingers to create a small dimple in the center of the tie just below the knot by pressing inward with one finger while tightening with the other hand. Adjust until the tip of the tie reaches your belt buckle.
How to Tie a Half Windsor Knot – Step by Step
The Half Windsor uses fewer wraps than the Full Windsor, which makes it slightly smaller and faster to tie. It still looks formal and intentional — just a touch less dramatic than the Full Windsor. This is the version most commonly recommended for job interviews and everyday office wear because it works with almost any collar style.
Starting position: Same as the Full Windsor — wide end on your right hanging about 12 inches lower than the narrow end.
Step 1 — Cross the wide end over the narrow end
Bring the wide end from right to left across the front of the narrow end.
Step 2 — Bring the wide end underneath the narrow end from left to right
Take the wide end and pass it under the narrow end, moving from left to right. The wide end is now on your right side pointing right.
Step 3 — Bring the wide end up through the neck loop
Pull the wide end up through the neck loop from underneath. It is now pointing upward toward your chin.
Step 4 — Bring the wide end down and to the left
Fold the wide end back down to the left side so it hangs in front of the narrow end pointing left.
Step 5 — Wrap the wide end across the front from left to right
Pass the wide end across the front of the knot from left to right, creating a horizontal band. The wide end is now pointing right.
Step 6 — Pull the wide end up through the neck loop again
Bring the wide end up through the neck loop from underneath one more time. It is now pointing upward.
Step 7 — Slide the wide end down through the front horizontal band
Pass the wide end through the horizontal band you created in Step 5. Pull it all the way through and down.
Step 8 — Tighten and create the dimple
Hold the narrow end steady and slide the knot up toward your collar. Use one finger to create a centered dimple just below the knot as you tighten. Adjust until the tip of your tie reaches your belt buckle.
Full Windsor vs Half Windsor — Which Should You Choose?
Both versions of the Windsor knot are excellent choices for formal and semi-formal occasions. Here is how to decide which one to wear:
Choose the Full Windsor when:
- You are wearing a wide spread collar or cutaway collar shirt
- The occasion is highly formal — a wedding, black tie dinner, or important presentation
- You want maximum visual impact and authority
- You are wearing a lighter, thinner tie fabric that needs more volume to fill the knot
Choose the Half Windsor when:
- You are wearing a standard point collar or button-down collar shirt
- The occasion is business professional or smart casual — office meetings, job interviews, client lunches
- You prefer a slightly smaller knot that is easier to tie consistently
- You are wearing a thicker tie fabric like wool or a heavy silk that might make the Full Windsor too bulky
For most men in most situations, the Half Windsor is the better everyday choice. It is versatile, looks polished, and works with the majority of shirt collar styles available in India and globally.
What Shirts Work Best with a Windsor Knot
The Windsor knot is a large, wide knot. To look its best, it needs a collar with enough space to accommodate its size without looking cramped.
Best collar types for the Windsor knot:
Spread collar — The most popular shirt collar for the Windsor. The wide opening between the collar points gives the knot room to sit comfortably and shows off its full triangular shape. This combination is what you see on most news anchors, politicians, and business executives.
Cutaway collar — An even wider spread than the standard spread collar. Works beautifully with the Full Windsor and creates an extremely bold, modern look. Best for confident dressers at formal events.
Semi-spread collar — A slightly narrower spread than the full spread collar. Works well with the Half Windsor and is the most common collar style on mid-range dress shirts available in most Indian clothing stores.
Collars to avoid with a Windsor knot:
Button-down collar — The soft, casual nature of the button-down collar clashes with the formal, structured Windsor knot. The knot will look cramped and the overall look feels like a mismatch.
Narrow point collar — Very narrow collar points leave almost no room for the Windsor knot to breathe. Use a Four-in-Hand or Kelvin knot with narrow point collars instead.
Common Windsor Knot Mistakes and How to Fix Them
Mistake 1 — The knot sits off-center This happens when you pull the wide end unevenly during the final tightening step. Fix it by loosening the knot slightly, centering it with your fingers, and tightening again slowly.
Mistake 2 — The tie is too short after tying You started with the wide end too high. Undo the knot and start again with the wide end hanging lower — for the Full Windsor, which uses more fabric, start with the wide end hanging 14 to 15 inches below the narrow end instead of the usual 12.
Mistake 3 — The tie is too long after tying You started with the wide end too low. Undo and start with it hanging higher.
Mistake 4 — The knot looks messy or lumpy This usually means you are rushing the tightening step. Take your time, keep even pressure on both sides as you slide the knot up, and use one finger to shape the dimple before the knot fully tightens.
Mistake 5 — No dimple in the center The dimple does not happen automatically — you have to create it. Just before you finish tightening, press one finger into the center of the tie just below the knot and hold it there as you tighten with your other hand. Release your finger when the knot is firm and the dimple will hold.
Mistake 6 — The knot collapses when you move This means the knot was not tightened firmly enough. After tying, give the knot a gentle firm upward push while holding the tie still to make sure it is fully seated.
How to Match Your Windsor Knot with Different Occasions
Job Interview The Half Windsor with a solid navy, dark grey, or burgundy tie on a white or light blue spread collar shirt is the standard interview combination. It signals professionalism, attention to detail, and that you take the occasion seriously. Avoid novelty patterns, bright colors, or cartoon prints for interviews.
Indian Wedding (as a guest or groom) The Full Windsor in a rich jewel tone — deep burgundy, royal blue, forest green, or gold — on a white or cream dress shirt looks exceptional at Indian weddings. The bold width of the Full Windsor fits the visual richness of wedding attire perfectly.
Business Meeting or Office The Half Windsor in a subtle pattern — small dots, thin diagonal stripes, or a textured solid — works for most Indian office environments. Match the color to your suit or jacket rather than trying to contrast strongly.
Formal Dinner or Award Ceremony Full Windsor in silk, with a suit or blazer. Choose a tie that matches or complements the pocket square if you are wearing one. The dimple is especially important here — it shows you dressed with intention.
Tips to Make Your Windsor Knot Look Better Instantly
A few small details separate an average Windsor from one that gets compliments:
Always create the dimple. A Windsor knot without a dimple looks unfinished. The dimple takes 3 seconds and makes the entire knot look deliberate and expert.
Match the tie width to your lapel width. Your tie at its widest point should be approximately the same width as your suit lapel. A very skinny tie with a wide lapel, or a very wide tie with a narrow lapel, throws off the proportions of the whole outfit.
Check the length every time. Even if you have tied the same tie a hundred times, always check that the tip reaches your belt buckle. Tie length varies slightly depending on which starting position you use.
Iron or steam your tie. A wrinkled tie undermines even a perfect Windsor knot. Store ties rolled or hanging flat, and use a garment steamer on wrinkles before wearing.
Use the tie bar. A tie bar clipped between the third and fourth shirt buttons keeps the Windsor knot centered and the tie falling straight all day. It also adds a polished detail that elevates the overall look.
How to Untie and Store Your Windsor Knot Properly
Never yank a tie off by pulling the narrow end through the knot. This strains the fabric and permanently damages the interlining, which causes the tie to look misshapen the next time you wear it.
Always untie the Windsor knot by reversing the exact steps you used to tie it. Gently loosen the knot, remove your finger loop by loop in reverse, and let the tie fall flat naturally.
Store your ties by either hanging them on a tie rack or rolling them loosely from the narrow end inward. Rolling them avoids creases and keeps the tie ready to use without needing to steam it every time.
Frequently Asked Questions About the Windsor Knot
Is the Windsor knot suitable for Indian formal occasions?
Yes. The Windsor knot works excellently for Indian corporate events, government functions, formal dinners, weddings as a guest or groom, and any occasion requiring a suit or blazer. It is widely recognized as the most formal and respected tie knot available.
Is the Windsor knot hard to learn?
The Full Windsor has more steps than simple knots but is not difficult once you understand the pattern. Most people can learn the Half Windsor in one sitting and the Full Windsor within two or three practice sessions. The key is to practice in front of a mirror with no time pressure.
What is the difference between a Windsor and a Four-in-Hand knot?
The Four-in-Hand is a smaller, asymmetrical knot tied with 4 simple steps. The Windsor is larger, symmetrical, and more formal. The Four-in-Hand is better for casual and everyday wear. The Windsor is better for formal occasions and professional settings where appearance matters. For a complete guide to all tie knots including the Four-in-Hand, read our complete how to tie a tie guide.
Can I wear a Windsor knot with a slim tie?
Technically yes, but it does not look ideal. The Windsor knot requires fabric to fill its wide triangular shape. Very slim ties (under 2.5 inches wide) do not have enough fabric to create a full, structured Windsor. Use a standard width tie (2.75 to 3.5 inches) for the best results.
Which is better for a job interview — Full or Half Windsor?
The Half Windsor is better for most job interviews. It looks formal and polished without being overly bold, it works with more collar types, and it is easier to tie consistently. The Full Windsor can look slightly too formal or aggressive in some interview settings unless you are applying for a senior executive role or attending a highly formal interview process.
Does the Windsor knot work with a bow tie collar?
No. The Windsor knot is specifically for neckties. For bow tie collar shirts, you need an actual bow tie. If you are curious about bow ties, we may cover that topic in a future guide on FindFreeHelp.
More Style and How-To Guides on FindFreeHelp
Now that you have mastered the Windsor knot, explore more practical guides on FindFreeHelp:
- How to Tie a Tie – Complete Beginner to Advanced Guide — Our main guide covering all the essential tie knots in one place
- DisneyPlus.com Login/Begin – Complete 2026 Guide
- Hulu.com/Activate – How to Activate Hulu on Any Device
- 100+ Secret Netflix Codes – Unlock Every Hidden Category
- Free AI Tools That Actually Work in 2026
If you create content around fashion and style, our free AI Hook Generator can help you write compelling opening lines for any article, and our YouTube Title Generator is perfect if you plan to make video tutorials around tie-tying techniques.